Category Archives: Paper Crafts

Merry Christmas!

And Happy Holidays to all!

This year I made two Christmas card designs. This first version started out as a mixed media art journal page. I scanned it and used Photoshop to add background shapes, manipulate colors and to add details. I started it two years ago, and got it out again last year, but I just didn’t get it to where I wanted it until the third try. I added in some of the faux postage designs Tom and I made a few weeks ago and that was finally the finishing touch it needed!

Christmas Card 2020 #1

As often happens, while scanning in and manipulating the faux postage designs to use as accents, I got another idea and was in the mood for some brighter colors so I made another card design. I had both cards printed and sent one design to half the Christmas card list and the other to the remainder.

Christmas Card 2020 #2

Besides the digital manipulation, the art and craft media and techniques that went into this card design consist of the following: rubber stamps, hole punches, collage, stickers, design tape (washi tape), and image transfers.

Greeting cards with materials inviting participation in #12daysoftomsbeard
Greeting card with materials inviting participation in #12daysoftomsbeard

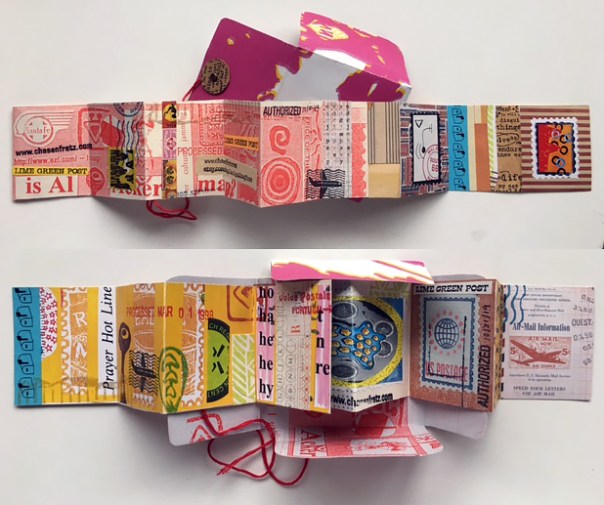
The picture on the left shows how a lot of our Christmas cards went out. We each made two sheets of faux postage. Tom didn’t care about having color copies made of his or displaying them as full sheets, so I scanned his two faux postage sheets to make black and white versions for coloring. Last year we were able to invite family members to help color in and draw on paper items for Tom’s beard in person but this year we are not doing gatherings in person so we are encouraging people to mail things in for Tom’s beard. We made the black and white shaped tags to give people something to color on in case they are stuck for an idea.

For those who got a little envelope of paper bits, those are for designing and collaging with if you choose, or you can just enjoy them in different paper projects if you have any. I made a Pinterest board on which I collect ideas for things to make with scraps. Scraps and paper ephemera are endlessly inspiring to me.

https://www.pinterest.com/tdannenf/made-from-scraps/

Tom is a good sport and is having fun thinking of places to take the photos each day and also helping pick out filters. I downloaded a couple of new phone apps that have some crazy filters in them and I’m enjoying using them to help make an art statement.

Here are the results for Day 1. I added a hint of a grunge frame, the hashtag in text and a border in Photoshop after sharing it on a couple of social media sites first. As I get used to how the sharing process works with the new filter apps I’m trying out, this part should run more smoothly.

Day 1 of #12daysoftomsbeard!

#12dayoftomsbeard lasts until January 6, so there is still plenty of time if you want to send something in! Some people probably don’t even have their greeting cards yet since I was a bit late getting them out due to school. I’m used to having to throw together holiday themed promotions at the last minute because often when working for a company or clients we would not have much time available to plan so we’d have to wait until client work slowed down right before Christmas to even start. It was and is frustrating to have to hurry through the planning and execution because we could have been so much more effective with more strategy and care. It was good practice for doing things fast though – I had to work fast once again this year because I’m in graduate school and there is very little time between the end of class and Christmas to work with. I don’t have much time to make gifts so a little fun activity and putting some extra work into the cards is the best I can do. I’m having fun with it – I hope other people do too!

#12daysoftomsbeard

12daysoftomsbeard_header

Here is one of our new Christmas traditions. For the second year in a row, here is #12daysoftomsbeard! Last year we distributed tags to family members on Christmas day to color on and decorate. We invited them to look for #12daysoftomsbeard on Instagram from December 25 to January 6. This year since we may not see family members in person on Christmas, I’m using the mail to try to get decorated tags to put on Tom’s beard. You are invited to decorate a tag from the image below and send it to us in the mail. Click the image to download a PDF to print out. Enjoy!

#12daysoftomsbeard
#12daysoftomsbeard

Faux Postage With Stickers and Image Transfers

Two finished Christmas faux postage sheets.
Two finished Christmas faux postage sheets. I’m going to make copies of these and cut them up to use on mail, tags, packages, and more.

Tom and I are spending part of this weekend planning our Christmas crafts, card list, and gift list. 2020 will be our third Christmas as a married couple! It’s always been part of my tradition to participate in as many Christmas crafts as possible. Since we are Roman Catholic, Christmas lasts a long time – over a month.  Both for cultural and religious reasons, the Christmas season for us is from the day after Thanksgiving to January 6. Activities all through this time period are how I celebrate Christmas, I don’t just celebrate it for one day. Integrating crafts and creative pursuits as much as possible is one way I show gratitude to God for the gift of being able to share creativity with other people, whether through a handmade gift, a piece of mail or a social media post. There is probably going to be more inspirational holiday sharing online this year than ever before and I’m going to try to do my part!

I’m noticing that Tom and I are developing our own set of Christmas traditions, incorporating some things transferred or revived from our families of origin, combined with activities that are unique to us as a couple. In no particular order we participate in:

1. St. Nicholas Day – we used to celebrate this when I was young, and since it is very special to me we have brought it back.

2. Daily Advent prayers with candles – we’ll be getting the candle set out soon!

3. Charitable donations.

4. Reverse Advent calendar food pantry donation – we did this last year and found it worthwhile so are going to do it again this year. It is a great way to remember to be grateful, keeping in mind what other people might really need instead of just what we want.

5. Christmas/New Year cards designed by me.

6. Handmade gifts.

7. Masses and worship.

8. Christmas poem by Tom.

9. #12daysoftomsbeard

10. Christmas Faux Postage.

11. Christmas decorations.

12. Holiday media and reading (such as Hallmark Christmas movies, prayer books and the Bloomin’ Christmas book).

13. Christmas baking and food.

14. Festive gift packaging.

15. Christmas stockings.

16. Christmas Journaling and Icebreaking Activity Cards.

Today I’m going to focus on this year’s Christmas Faux Postage. It’s going to play a part in this year’s card design and possibly other craft projects too so I’m working on the faux postage first. As I did last year, I printed out two each of templates for making faux postage that I made available online, and Tom and I each started building compositions on two sheets. Here are two articles I wrote last year showing how I made designs with the two templates, including links for downloading the templates.

Low Tech Faux Postage: Part 1

Low Tech Faux Postage: Part 2

This year to start off our stamp sheets, Tom and I sat down with the printed templates, stickers, red, green and white image transfers that I made last year, collage papers and various markers and pens.

Developing four Christmas themed stamp sheets

I’m in the process of finishing up those stamp sheets by treating them in a similar manner as the ones in the two tutorials linked to above, Low-Tech Faux Postage parts 1 and 2. I have stamped out some tiny words such as “US Postage” on strips of scrap paper and am gluing them down where there is room on the stamps designs. I’m making borders with mixed media. I’ll add some postmark stamps to the sheets and use stamps and perhaps stencils to add a little fine texture here and there where I think it’s needed. When the stamp sheets are done, I’ll get color copies made and cut up the copies into individual stamps to use on all kinds of Christmas paper crafts.

Finishing Touches For Mini Accordion Books

Photo by Carien Van Hest. Both sides of the mini accordion book I sent her with it's two-sided envelope.
Photo by Carien Van Hest. Both sides of the mini accordion book I sent her with its two-sided envelope.

Back in 2019, I made a couple of square mini accordion books, 2″ x 2″ in size when folded up. While sending out my 2020 Christmas cards, I finally made envelopes for holding four of them and I sent them out to a few people in my Mail Art network. Here is an article I wrote about how I made that batch of little books – Made From Scraps: Mini Accordion Books.

In the spring of 2020, shortly after the pandemic started, my husband Tom and I started hosting a #virtualartparty online for several weeks in a row to help ourselves and people we know cope with loneliness and anxiety. During the second session, I demonstrated how to make these little accordion books since they can be made from scraps and supplies many people already have around the house. At the end of this article is the archived video of that accordion book session. I started two books that afternoon, which I finally finished recently.

The image below shows the first book, titled “The Wonder of Life”. The top two images are of each side semi-folded. Below that are some close-ups of different sections of the book. To make these mixed media collage compositions, I combined found paper scraps, rubber stamping, design tape, stencils, marker drawing, and image transfers made from clear packing tape. Here is an article I wrote about how to make the image transfers – Art Journaling With Stencils and Image Transfers.

mini_book_wonder_of_life
Mini book by Carolyn Hasenfratz Winkelmann called “The Wonder of Life”.

The next image below shows several examples of image transfers I was making next to sections of the stretched out accordion books that I was trying to coordinate with. I knew I would not know exactly how the semi-translucent transfers would look when they were laid over the underlying paper collage, but to make sure they were at least somewhat harmonious I looked for images for my transfers that reflected the colors and shapes of images I used in my first layer.

Coordinating transfer images to lay over collaged images.

I made a template for an envelope to fit the books or any thin 2″ x 2″ object for people to download and use to make an envelope for their book if they so wished.

Mini Book Envelope Template

I used the above template to trace two envelopes onto cardstock. I cut the envelopes out and made folds where the dotted lines are in the template so that the envelopes would be thick enough for the little books. With a circle punch I cut little circles to use for making a string closure. I made extras knowing I was going to put transfers on these circles – I wanted to be able to choose from several to get ones that looked good with the finished envelopes.


cutting_and_folding_covers

My next step was to paint the fronts and backs of each envelope with clear acrylic medium, letting the medium dry before I flipped them over to coat the other side. This step was for three purposes – to increase durability, to reduce wrinkling when I later applied layers of transfers and paper, and to make the paper more receptive to the slick tape transfers. When all was dry, I applied transfers to the outsides of the envelopes using clear medium as the glue and burnished them well to remove any air bubbles. After they were dry I trimmed the transfers to the edges of the envelopes.

Applying tape transfers to cardstock envelope.

folding_covers
Envelopes after trimming.

For the insides of the envelopes, I used the acrylic medium to laminate a pieces of paper with a matte finish to the insides of the envelopes. I wanted a matte finish for the insides instead of a shiny finish so that the envelopes would not stick to the books when stored.

The final steps in finishing the book covers were to attach the small cutout discs I made earlier with small brads, and wind embroidery thread around the discs to make a string closure.

Below is the other book I made, “The Wonder of Creativity”. Both books are for sale here on Etsy: https://www.etsy.com/listing/977853529/mini-artist-books-collage-and-mixed?ref=shop_home_active_1&frs=1

mini_book_wonder_of_creativity
Mini book by Carolyn Hasenfratz Winkelmann called “The Wonder of Creativity”.

Helpful links for Virtual Art Party #2: Mini Accordion Books, for further exploration into different ways of making handmade books.

Make a Greeting Card With a Star and Arrow

mixed media greeting cards

I designed this project around some collaged stars I had made awhile back while working on my previous tutorial, Making Greeting Cards From Scrap Papers. If you don’t want to make your stars in that style, you can use any paper or cardstock star of your choice.

This card design uses quite a few tools and materials, so if you are going to get them all out you might as well make several. Having extra cards on hand is a real time saver sometimes!

matching_stars_with_card_colors

Supplies:
Cardstock
Assorted small paper scraps
Decorative paper large enough to make envelopes
Tracing paper
Tape, single and double-sided
Pencil
Scrap chipboard
Glue stick
Black rubber stamping ink
Clean scrap paper
Envelope template – free download here for a template that fits a 5.5 inch x 4.25 inch card – Envelope template for Rectangular Card

Tools:
Greeting Card With Star and Arrow Template (free download here)
Paper cutter
Metal ruler
Self-healing cutting mat
Scissors
Rubber stamps with sentiments
Colored pencils
Prismacolor art stix or similar product (like Conte crayons in more than just basic colors)
Sharpie Pen
Sharpie Twin Tip Marker Fine/Ultra Fine
Squeegee or bone folder tool
Rubber stamp Bubble Border Small or other border stamp
Rubber stamp Rounded Squares and Rectangles Border Large or other border stamp
Stencil for the “awesome” arrow – Mini Word Arrows 6×6 Stencil – if you don’t have that stencil, you can use a stamp, stencil or paper of your choice for the small arrow portion of the card.

star_greeting_card_with_arrow

Instructions:

Download and print out my free template, Greeting Card Sketch – Star With Arrow.

Tape tracing paper over the printed out template, and make tracings in pencil over the star portion, the arrows and the shapes on either side of the star.

Write “front” on the tracings before you remove them from the template.

tracings

You’ll use these tracings to transfer your pencil markings onto the the backs of scraps of chipboard to make templates for tracing and masking.

To transfer, place your scrap chipboard pieces face down and flip your tracing paper over so that the back is facing up. Tape in place and go over your pencil lines. When you lift the tracing paper, you’ll have lines you can follow as you cut.

Out of one piece of chipboard, use a utility knife and a metal ruler to cut the two side shapes and the star out.

cutting_from_back

Make yourself templates for the large and small arrows as well.

cut_outs

Put the front of the card on your work surface and tape the stencil/mask over it. With a thin, light pencil outline the star and two side shapes. These light pencil lines will help you line things up in the later steps. Place the large arrow template where you would like it and trace around it too.

outlining_in_pencil

Stamp in black through the mask onto the front of the card, alternating the border stamps you are using.

stamping

Lift the mask to see that portions of the front of the card are partially filling the cut out shapes. This is a technique you can use with stencils or masks you cut yourself or with purchased stencils.

stamped_template_lifted

At this point, you can choose to erase your pencil guide lines, or disguise them by drawing over them with a marker or color pencil. I drew over mine with harmonious colored pencil colors.

green_web

Choose an art stick color and go over your outlines heavily, and the insides of your shapes lightly.

green_web_2

Choose a 1″ x 5.5″ piece of scrap decorative paper in a harmonious color. Fold it lengthwise, apply glue to the back and use it to cover the fore edge of the card.

Trace the large arrow onto a piece of decorative paper and cut it out. Glue it in place on the front of the card.

Take a bright, lighter piece of paper and tape it to your work surface.  Tape your stencil over the paper so that the paper shows through the word “awesome”. Outline the “awesome” arrow and lettering with a black Sharpie pen, then lift the stencil and finish filling in the arrow with the fine tip of a Sharpie double-sided black marker.

awesome

Glue the star and small arrow to the front of the card. Accent the lower and rightmost edges of the star and small arrow with the thick tip of the double-tipped Sharpie marker.

Make an envelope for your card by tracing Envelope template for Rectangular Card onto the back of a piece of decorative paper, then folding it and taping it together. Your’e done!

Low Tech Faux Postage: Part 2

Finished sheet of faux postage stamps made to put on my 2019 Christmas cards.

1. Download and print out the two-page PDF file Low Tech Faux Postage. You’ll use the second page for Part 2. (Part 1 is located here: Low Tech Faux Postage: Part 1)

2. With some light colored markers or colored pencils, color around the outside edge of the faux stamp sheet and inside some of the open areas inside the stamps.

Faux postage printouts colored with pencil and markers.
In the image on the left, I’ve colored on the printout with colored pencils. On the right, I used markers and gel pens with stencils.

3. If you own any rubber stamps with postal type words or sayings on them, get them out and stamp them on some white or light colored paper to make parts to collage onto your stamp designs.

rubber stamping words on paper then gluing them down
Stamp out and glue on postal-related words. Then add border stamps in black ink to frame the composition.

4. Tear or cut the words out and glue one onto each rectangle.

5. Take some border stamps and stamp them in black ink around the composition to make a border. I used some fairly bold stamps because the black rectangles in the original printout are pretty bold and dark so a strong border will help balance the whole composition.

6. Add some color with other rubber stamps from your collection.  I’m currently working on Christmas cards and party invitations so I used some rubber stamps that would fit into use on those kinds of items – either on the actual card or on the envelope.

Faux postage sheets with coloring, collage, stamping and stickers.
My husband Tom made the sheet on the left, and I made the one on the right. I decided after adding stamping that my design needed a lot more pizzazz so I got out some stickers and cut them into pieces to add to my composition.

7. When I make a stamp sheet like this that is designed to be viewed as a whole composition as well as single stamps, I take the original and get color copies made of it. Then I cut out individual stamps from the color copies to use on other projects and keep the original to display intact.

Low Tech Faux Postage: Part 1

stamp sheet collageFaux postage is a really fun mixed media project to make because it’s relatively non-threatening to create tiny works of art in a format that everyone is familiar with. There are lots of craft products you can buy that make it easier to make artwork that looks like postage stamps. A long time ago I designed some rubber stamps for this purpose and some of them are currently for sale in my Etsy shop. You can make this project with any other small stamps that you own also and a selection of paper crafting supplies. Enjoy!

1. Download and print out the two-page PDF file Low Tech Faux Postage. You’ll use the first page for Part 1.

2. Cut out some paper rectangles that are 1 3/4 inches tall and 1 3/8 inches wide from dark paper. You will need at least 16 rectangles.

Cutting rectangles from paper scraps to glue onto faux postage template.

3. Trim the edges with a paper edging scissors and arrange on your Low Tech Faux Postage sheet Page 1. You can think of your sheet as one composition made up of 16 tiny compositions if that helps you to get ideas. Glue down your trimmed paper rectangles.

4. Use a 1″ square paper punch and start by punching out one square for each rectangle from a selection of random scrap papers. Arrange until you are satisfied. If you have similar sized paper punches in other shapes such as circles, feel free to try them out. As you look through your scrap papers, you might get inspired to cut out other shapes. If you are moved to do so, go ahead and cut out whatever you like and glue down on your sheet without worrying about whether or not you’re “inside the lines”.

Paper collage on the template sheet
Paper collage on the template sheet. Mine is on the left, my husband Tom’s is on the right.

5. Take some tiny rubber stamps with words, phrases, numbers or symbols that have to do with philatelic stuff like stamps or cancellations. Stamp them in permanent black ink on light colored pieces of scrap paper. When the ink is dry enough to handle, cut or tear out what you have stamped.

6. Glue the torn or cut pieces to the collage work you’ve already done to help make each rectangle suggest a postal stamp design.

Stamped paper bits glued to collage
Stamped paper bits glued to collage.

7. Continue to add embellishments to your stamps until you think they look finished. Here are some suggestions for what you can add:

More cut collage papers, found or commercial
Stickers
Drawing – paint and gel markers are interesting choices to experiment with because you can write with them on slick surfaces and sometimes dark backgrounds as well
Stenciling
Image transfers
Design tape
Rubber stamping

8. When your stamp sheet is done, you can frame the whole thing to display it, cut apart your stamps to make tiny artworks, make color copies then cut apart the color copies, or put the whole thing in an art journal. Your imagination is the only limit and the most important thing is to have fun!

Made From Scraps: Mini Accordion Books

Many years ago, as one of my Mail Art projects, I used to fold two-inch wide pieces of paper into little accordion books and decorate them with rubber stamps and pieces of paper that I cut out from incoming Mail Art and decorated envelopes. I carved a rubber stamp with a little graphic of a Mail Box and the words “Bits of Mail” to stamp on the little book covers. Before sending them out, I dated and numbered them on the back. I saved one example for my archives and made a few color copies to use later as collage inspirations. While I was getting the color copies made, it came up in conversation with the copy center worker that one of the black and white machines had red toner in it. I made a lot of copies with the red toner because I knew I’d find uses for the copies later!

One of my original mini accordion books from 1998 with some color and red ink copies I made at the time for future collage work.

Some of my old collage papers along with my Mail Archives had been in storage unseen for 20 years or more. I’ve been getting some of them out lately as I move stuff. With fresh eyes, I’m getting some new ideas and inspiration for improving old ideas. I decided to take these old copies and make new versions of the mini accordion books.

First I cut up the copies that weren’t already in strips into two inch wide pieces, the same size as the originals. Then I folded them and glued one red ink copy to one color copy back to back to make longer books.

Old copies with color ink and red ink cut into two-inch strips, folded and glued to make mini accordion books.

I had a large paper crafting stash by 1998 already because I started making collages in 1985 in my first college design class and I’ve been collecting interesting papers for collages ever since. In the intervening years, there are a lot more paper crafting supplies available and some of them are a lot more to my taste than what was available in the late 1990s. Back in the day I would have said I was a “weird” stamper not a “cute” stamper. I also enjoy sophisticated antique imagery and have a lot of papers from two of my favorite brands, Tim Holtz and 7 Gypsies, in my stash. I decided that the Tim Holtz idea-ology Correspondence paper pad was a good fit for this project and I glued some of the postal themed textures onto a selection of the blank pages of my books. The dominant colors in this series are red white and blue which looks good with the red toner ink on some of my papers and the postal motifs fit the “Bits of Mail” theme.

Next I went through I box of paper scraps that I keep for teaching a card class that I run from time to time on how to make greeting cards from little scraps, rubber stamps and stencils. I took out a selection of papers that I thought would make good backgrounds and glued them in a random fashion to every other page, leaving some blank.

Mini accordion books ready for adding content.

There is an old trick that I learned in drawing class long ago to help get unstuck if you are facing a blank piece of paper with no ideas – draw a quick frame around your drawing area before you start. This helps because it’s less daunting to start drawing on a paper that you’ve made some marks on than a blank surface. I get the same creative boost from using scrap papers for perhaps a similar reason – there is already some content there, however sparse and random, and that is often all I need to get me going in a creative direction.

The little accordion books I’ve made are pictured above ready to add content. What kind of content would that be? There are lots of things I could do with these little books. I could write, draw, stamp or paste in words and/or images to make a finished artistic statement. I could use them as a storage and display folio for tiny works of art such as postage stamps, faux postage stamps or tiny photos and images. I could send them off into the Mail Art network as an “add and pass on” project. What would you make?

tiny books made by various artistsFor additional inspiration, here are some samples of tiny books made by other people that I’ve received through the mail over the years. People of any age and ability level can make tiny books. Why not try one?

Speaking of the Lime Green News and studying other cultures…

Collage made with paper and rubber stamps

I made this collage right at the time I stopped publishing the Lime Green News in paper form. I’m pretty sure I have a draft written on some floppy disc somewhere about how I made this collage and some others using outlines of black paper that I cut out with paper edging scissors to make compositions that look like postage stamps. I was going to publish the tutorial and a copy of the background for people to make their own stamps. I made several stamp sheets using this background as I recall. Such stamps are also known in the art and stamp collecting world as “Cinderella Stamps”, “Postoids” and “Artistamps”.

I never went back to the idea with this pseudo-postal background because I assumed that with computers and desktop publishing becoming more prominent people would not be interested in making faux postage stamps the “analog” way any more. But looking at this collage now that more than 20 years have passed since I made it I actually like it a lot. After going to that Gauguin show that I wrote about in my last blog post I’m reminded of how much I loved studying other cultures and abstracting some elements from them into and combining them with Mid-Century Modern type of abstraction. A lot of the black line work was made by rubber stamps. The Egyptian hieroglyphics stamp is a commercial rubber art stamp, but I carved all the others.

The above collage rearranged and with the colors inverted to use as a Facebook header

For some reason if I scan a collage and invert the colors in Photoshop, the results are often better than the original. I needed a new Facebook header so I rearranged the above collage and did a quick inversion. Fun!

Here is another collage I made using the same background

Make Nautical Thank You Cards

thankyoucards_nautical_finished

While making items for my wedding last summer I used a lot of nautical themed papers made by Canvas Corp. I saved a lot of the paper scraps to use in one of my favorite card-making techniques. I like to glue paper scraps onto narrow strips of scrap cardstock then apply rubber stamping ink to the edges to unify the strips. They make interesting parts to use in all kinds of paper crafts. I’ve previously written other articles that show this technique in action.

Pretty Packaging for Mason Jar Candles
http://blog.canvascorpbrands.com/quick-easy-pretty-packaging-mason-jar-candles/

Making Greeting Cards From Scrap Papers
http://www.chasenfratz.com/wp/making-greeting-cards-from-scrap-papers/

Materials and Tools
Canvas Corp paper sheet Sand & Sea Art Pages on Kraft CCP2883
Assorted paper scraps with a nautical theme, mostly from collections by Canvas Corp
Scrap cardstock
Black permanent rubber stamping ink
Permanent rubber stamping ink in colors that complement the project
Strips of light colored scrap paper that harmonize with the chosen paper scraps
Pieces of cardstock that harmonize with the chosen paper scraps
Clean scrap paper
Scissors
Glue stick
Paper cutter
Computer with scanner and graphics software
Eraser for stamping the edges of the paper

materials_1

These very detailed strips tend to look good in designs next to areas with less detail. To make thank you cards to acknowledge wedding gifts and other help people generously gave us for the wedding, I made some scrap paper strips edged in red and scanned them for use in a digital file which I had printed on cardstock at a copy shop. I spelled out the word “THANKS” in nautical flags by making little flag collages with Canvas Corp nautical themed papers and scanning those as well. After digitally manipulating the scanned paper pieces, this is the digital card design I came up with.

thankyoucard2_web

The red-edged strips that I scanned were now free to use in actual handmade cards and not just the digital design. I decided to combine the strips with imagery from the Canvas Corp paper sheet Sand & Sea Art Pages on Kraft CCP2883. The six images on the paper sheet are just about the size of the cards I want to make and the subtlety of the designs will really set off my paper strips. I decided to make six 5.25″ x 4.25″ cards. I selected six pieces of cardstock and cut them to 5.25″ wide and 8.5″ long then folded them in half to make the cards. Next I selected strips of light colored paper in colors that harmonized with my color scheme and stamped the sentiments “just a note” and “thank you” with black permanent ink. I made more strips than I thought I would need so that I would have lots of options. Also, I can use the extras for making other cards and for the card making classes that I teach.

stamped_paper_strips_web

To begin assembling the front of the cards, I cut each of the six images on the sheet Sand & Sea Art Pages on Kraft to just a little bigger than the card front. I cut the image in two then I inserted a strip with the words “just a note” then a scrap strip edged in red between the two pieces of the image. I glued the parts to the front of the card with a glue stick then trimmed away the excess. Then I glued the circular paper punched out piece with the stamped words “Thank You” onto the front of the card.

assembling_card_front