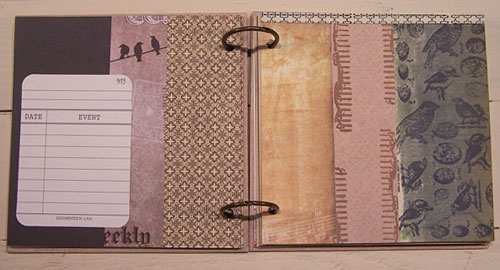
I make a lot of 6 x 6 inch pages for handmade journals. When you cut a 6 x 6 inch piece of paper out of an 8.5 x 11 piece of paper you’re left with a lot of leftover 8.5 x 5 inch pieces. Here is a project that will use up those extra pieces and possibly some of your other paper scraps as well. If you’re a regular reader of mine you know I try not to waste anything!
What you’ll need:
Text weight paper
Card stock
Decorative papers
Paper cutter
Glue stick
Self-healing cutting mat
Metal ruler
Bone folder/burnishing tool
Clean scrap paper
Scissors
Double-sided tape
Awl or needle tool
Small hole punch
Brads
Heavy thread or lightweight cord
Beads
1. Download the template Mini Album and print it out to use as a guide.
2. Cut out a piece of 8.5 x 4.75 inch card stock. Fold in half.
3. Out of decorative papers, cut 2 8.5 x 1 pieces and 4 4.75 x 1 pieces.
4. Fold one of the 4.75 x 1 inch pieces lengthwise and make a sharp crease with the bone folder. Flatten out and apply glue to the back. Glue down on the inside fold seam and burnish well (see A on template).

5. Fold and glue two more 4.75 inch pieces to the edges (see B on template).

6. Fold and glue 8.5 x 1 inch pieces to top and bottom edges (see C on template). Burnish all well.

7. Fold another of the 4.75 x 1 inch pieces lengthwise and make a sharp crease with the bone folder. Flatten out and apply glue to the back. Glue down on the outside spine and burnish well (see A on template).
8. Cut out four pieces of 4.25 x 3.75 inch decorative paper. They can be all the same or all different. Glue to the front and back covers, inside and out. If you want to decorate the front cover further with more embellishments you can. Burnish all well.

9. Cut out front and back pocket pieces, fold in tabs and tape in place with double-sided tape.

10. Cut out twelve pieces of 8.25 x 4.75 text-weight paper. Fold all in half and nest pages. Use paper cutter to trim the paper that sticks out.
11. Using template as a guide for placement, punch four holes in the front cover with an awl, needle tool or small hole punch, and four holes in the back. Push brads in holes.
12. Using template as a guide, punch small holes in spine of paper and album cover with awl or needle tool.
13. Cut off a piece of cord that is about 28″ long. Thread the cord onto a needle and poke into the top first hole from the outside in, leaving about 7″ of cord trailing.
13. Run cord through the rest of the holes according to this sequence – second hole inside to out, third hole outside to in, fourth and bottom hole inside to out, third hole outside to in, second hole inside to out, then tie off. Add beads to cord if you want.
You’re done!


